Screenshot Setting
Select the user on agent list, click the "Agent Settings" on the "Settings" menu to start the Agent Property Setting
Alternatively, double click the user in the agent list.
Click the "Screenshot" tab.
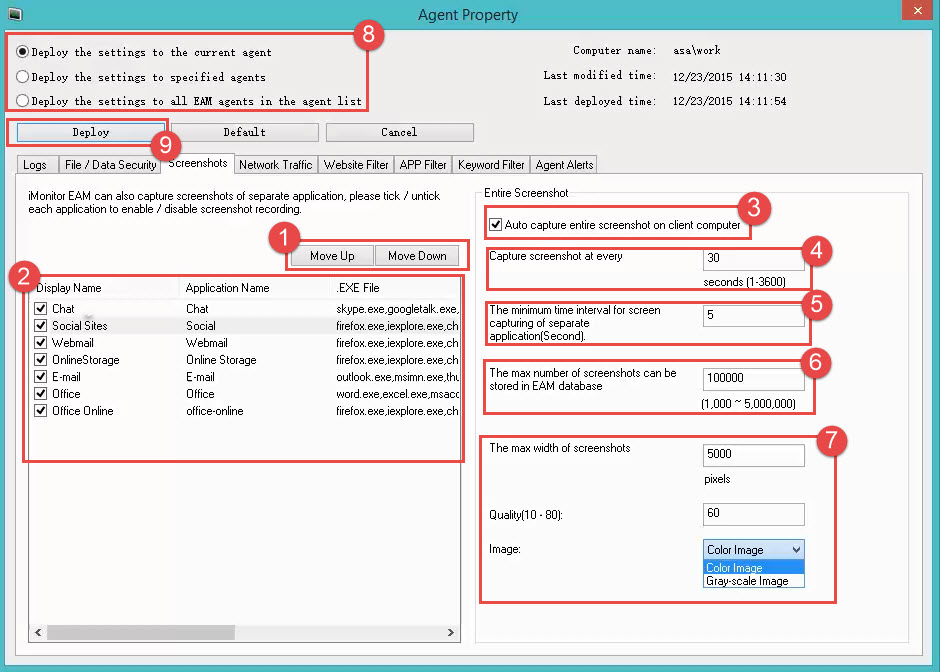
1. Tick each of those items below to move up or move down.
2. Tick each specific to enable screenshot recording. Untick each specific to disable screenshot recording.
3. Tick the check menu to enable auto capture screenshot on client computer.
4. Set the frequency to capture screenshots by second on client computer.
5. Set the minimum time interval (by second) for screen capturing of separate application.
6. Set the maximum number of screenshots can be stored in EAM database.
7. Set the width, quality and color of the screenshots.
8. Deploy the settings: Tick each deploy rule to deploy the settings.
Deploy the settings to the current agent / Deploy the settings to specified agents /Deploy the settings to all EAM agents in the agent list
9. Click the "Deploy" button to finish the deployment.